
Custom Badge Pins: How to Choose Size, Shape, and Backing
Custom badge pin planning guide
Choose size according to the smallest important detail, choose shape according to the strongest recognizable outline, and choose the pin backing according to where and how the badge will be worn.
A custom badge pin can have the right artwork and still feel wrong if its physical format was treated as an afterthought. A detailed crest may become crowded when made too small. A tall or uneven shape may rotate when supported by one post. A backing that works on a tote bag may not be the most practical choice for a formal jacket.
The three decisions are connected. Size affects weight and readability. Shape affects balance and post placement. The attachment affects how the badge sits on fabric. Reviewing them together produces a more useful proof than choosing each option separately.
The shortest answer: simple logos can usually work at smaller dimensions, while detailed artwork needs more room. Compact symmetrical pins often use one post; wide, tall, or irregular designs may benefit from two. Rubber and butterfly clutches are common post-based options, while other available choices may include deluxe, jewelry, magnetic, or safety-pin attachments depending on the product.

Measure the longest side
Custom pin size is normally described by the longest dimension of the finished outline, whether that is width, height, or diameter.
Review at actual size
A proof can look clear while enlarged on a monitor. Also view it close to the intended physical size before approval.
Plan the back early
Post position, attachment type, backstamp, and packaging space should be considered before the front design is locked.
How is custom badge pin size measured?
Pin size is generally measured across the longest dimension of the finished design. A circular badge is measured by its diameter. A wide rectangular pin is measured by width. A tall character or shield is usually measured by height. One inch equals 25.4 millimeters, so a 30 mm pin is slightly larger than one inch.
The longest dimension does not tell the whole story. Two pins can both be 1.25 inches and still feel very different. A compact circle uses most of its available area. A narrow script logo or long vertical shape may have much less usable space for text and small details.
When comparing sizes, look at the actual filled area, not only the outer measurement. Also consider the number of words, the smallest color cells, the thickness of metal lines, and how far away the badge will normally be viewed.
A practical lapel pin size guide
There is no single standard size that works for every logo. The ranges below are planning references, not guaranteed production options or universal rules. The final recommendation should follow the artwork review.
Small and subtle
Best explored with one clear symbol, minimal lettering, and a compact outline.
Simple logo range
A useful starting area for short text, simple marks, and everyday lapel pins.
More design room
Allows more room for a mascot, crest, date, layered lettering, or an irregular shape.
Statement format
Useful when the design needs impact or detail, but weight and attachment layout require closer review.
Do not make a badge larger only because the artwork contains too much information. First decide whether every word and small element is necessary. Removing secondary copy can improve readability without increasing the finished dimensions.
At the other extreme, do not shrink an event poster into a pin and expect every detail to remain visible. A pin needs a clear hierarchy: one main symbol, a limited amount of supporting text, and enough spacing for the metal and color process to work.

How to choose the best shape for custom badge pins
The strongest shape is usually the one a viewer can recognize before reading the small details. A circle can make a seal feel complete. A shield supports school, service, and association identities. A die-cut silhouette can turn a mascot, letter, character, or object into the outer edge of the badge.
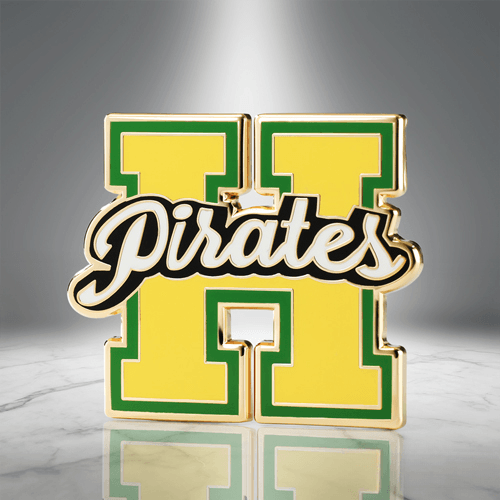
Logo-following shape
Letting the edge follow a strong letter or emblem can make the badge recognizable without adding a generic circle around it.
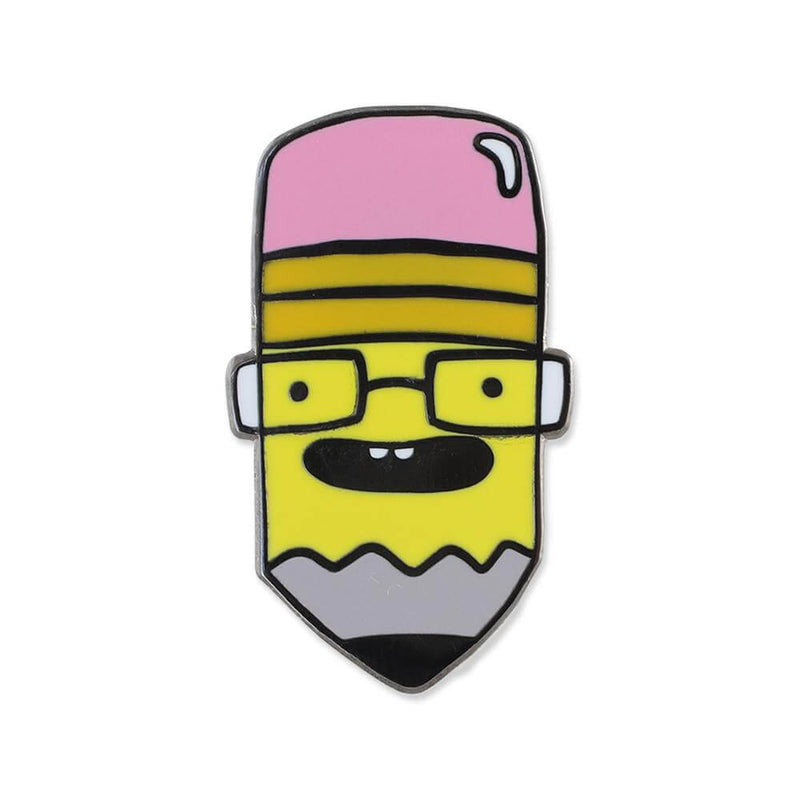
Tall vertical shape
A narrow character or object may need more height to preserve detail and careful post placement to reduce rotation.
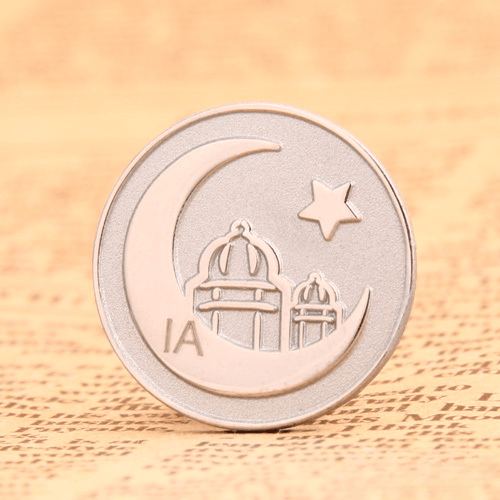
Compact geometric shape
Circles, ovals, shields, and rectangles use space efficiently and can support balanced lettering or formal marks.
When should you use a standard geometric shape?
A geometric outline can organize text, dates, and border elements. It is useful when the artwork already behaves like a seal, crest, patch, or nameplate. It can also make a group of different designs feel consistent when they belong to one series.
When should you use a custom die-cut outline?
A custom outline works best when the silhouette itself carries meaning. Mascots, initials, landmarks, tools, vehicles, character poses, and product shapes can become more distinctive when the edge follows the artwork. Avoid fragile-looking spikes, very narrow bridges, or small notches unless they have been reviewed for the chosen size and process.
Do cutouts improve every design?
No. A cutout can add useful negative space, but it should solve a visual problem rather than serve as decoration. Small openings may need adjustment, and each cutout changes the balance of the piece. Ask for it when the empty space is part of the identity of the design.
Should a custom pin use one post or two?

One post is a natural starting point for a compact, balanced badge. It keeps the back simple and may be sufficient when the design is small and close to symmetrical.
Two posts can help a wide, tall, heavy, or irregular pin sit in the intended direction. They are especially useful when rotation would make the artwork look obviously crooked. The posts should be separated enough to stabilize the piece without being pushed too close to a thin edge.
The number of posts and the clutch type are separate decisions. A two-post pin can still use rubber or butterfly clutches, for example. Post positions should appear on the back view of the proof so you can confirm their spacing before production.
One post may fit when
The badge is compact, relatively light, visually balanced, and not harmed by slight movement during normal wear.
Two posts may fit when
The design is elongated, asymmetric, larger, more substantial, or needs to remain in one clear orientation.
How to choose a lapel pin backing or attachment
The phrase lapel pin backing can mean two different things. It may refer to the clutch or attachment that holds the pin to clothing, or it may mean the printed backing card used for presentation. This section covers the attachment first.
MZIHO product pages indicate that available choices may include rubber clutch, butterfly clutch, deluxe clutch, jewelry clutch, magnetic attachment, and safety pin. Availability varies by pin type, so use the exact options shown on the selected product page.
Tell the supplier where the badge will be worn: suit lapel, staff uniform, hat, jacket, backpack, tote, display board, or retail packaging. The same attachment does not behave identically on every fabric and surface.
A pin backing is not the same as a backing card
The attachment holds the badge to a garment or item. A backing card presents the pin for retail, gifting, mailing, event distribution, or brand communication. A custom card can carry a logo, collection name, care note, website, campaign message, or short product description.
Backing-card decisions include card dimensions, pin position, logo placement, hole spacing, and the amount of room needed behind the clutch. The card should not cover important artwork, make the badge feel off-center, or force the clutch against printed content.
MZIHO product information lists possible packaging choices such as individual poly bags, backing cards, velvet bags, velvet boxes, and plastic boxes. Select only the options available on the relevant product page and include custom card artwork or notes when required.
What should you check on the digital proof?
The proof is where size, shape, and backing become one physical plan. Check it enlarged for spelling and detail, then also view it near the intended finished dimensions.
A digital proof communicates artwork and selected specifications, but it cannot reproduce exact physical weight, metal reflection, fabric behavior, or screen-to-product color. If balance or attachment strength is a concern, explain the intended use before approval.
What to prepare before ordering custom badge pins
You do not need to know every manufacturing term. A useful project brief gives the team enough context to recommend practical dimensions and attachment placement.
- Artwork: send a vector file when available, or the clearest high-resolution reference you have.
- Target size: give the preferred longest dimension in inches or millimeters, or ask for a recommendation.
- Quantity: MZIHO custom pin orders normally start at 25 pieces per design.
- Use: explain whether the badge will be worn, sold, mailed, presented, or attached to a bag or uniform.
- Shape: state whether the outline should follow the artwork or use a geometric border.
- Attachment: name the preferred option or describe the garment and let the team review it.
- Presentation: include backing-card or packaging requirements when relevant.
- Required date: provide the destination and needed arrival date so feasibility can be reviewed.
How the MZIHO custom order process works
Submit the design
Choose the closest product, upload the artwork, and provide the size, quantity, intended use, shape, and attachment preferences.
Review the free proof
Check the dimensions, outline, lettering, post positions, backing, and packaging. Revisions are available until the proof is approved.
Approve production
Production begins after final approval. Use the current product page and store policies for timing and delivery information.
To compare MZIHO pin types and current customization choices, visit the custom lapel pin collection. For help matching artwork to a production method, read the custom pin design and process guide.
Frequently asked questions
What is the most common lapel pin size?
There is no single size that fits every design. Around 0.75 to 1.25 inches is a useful area to explore for many simple logos and emblems, but detailed or elongated artwork may need more room. The longest dimension and usable design area both matter.
Is pin size measured by width or height?
Custom pin size is normally stated by the longest finished dimension. That may be width, height, or diameter depending on the shape. Confirm the exact measurement and unit on the proof.
Should an irregular pin have two posts?
It may. Two posts can help wide, tall, asymmetrical, or larger designs remain in the intended orientation. The best decision depends on the outline, weight distribution, and where the pin will be worn.
What is the difference between a rubber clutch and a butterfly clutch?
Both attach to a pin post. A rubber clutch has a soft exterior, while a butterfly clutch is a metal spring fastener with release tabs. Availability should be confirmed on the selected product page.
Can I choose a magnetic pin backing?
A magnetic attachment may be available for selected products. It avoids piercing the garment, but suitability depends on badge weight, fabric thickness, expected movement, and the exact option offered.
Can MZIHO add a custom backing card?
Backing cards may be available as a packaging option. Add the card selection, artwork, and layout requirements to the order so size, hole placement, and production suitability can be reviewed.
Can I see the post positions before production?
Yes. The back layout should be reviewed on the digital proof. Confirm the post count, spacing, orientation, and any backstamp or cutout before approving production.
What is the MZIHO minimum order for custom badge pins?
MZIHO custom pin orders normally start at 25 pieces per design. If an order contains several designs, review the requirements for each design before placing the order.
Need help choosing the right size and pin backing?
Send MZIHO your artwork, intended use, quantity, and preferred dimensions. The team can review the outline, attachment layout, and presentation requirements before production begins.