
How to Make Badges: A Practical Guide to Custom Pin Production
CUSTOM PIN BADGE GUIDE
A practical route from your idea to a finished pin
If you are searching for how to make badges, the first question is what kind of badge you mean. This guide covers professionally made custom pin badges and custom lapel pins—not digital badges or a home button-badge press.

START WITH THE RIGHT QUESTION
What does “make badges” mean for your project?
The phrase can refer to paper name badges, digital achievement badges, round button badges, or custom wearable pins. For a logo, club emblem, school mascot, event design, or branded collectible, a professionally manufactured pin badge is usually the relevant route.
THE ORDER WORKFLOW
How do you make badges? Seven steps from idea to delivery
A custom badge order is easier when design decisions happen in the right sequence. The following steps describe what you, the buyer, should prepare and approve. The exact workshop sequence can vary by material and construction.
Choose the product that matches the finished look
Start with the result you want people to see and feel. Soft enamel has visible texture, hard enamel feels smoother, printed pins preserve gradients and photographs, die-struck pins focus on metal relief, 3D cast pins add sculpted depth, and acrylic keeps full-color artwork lightweight.
Choose the available options on the product page
Select the options shown for that product, such as size, finish, attachment, packaging, and other available details. Options vary by pin type, so use the actual product page rather than assuming every construction offers the same configuration.
Select the quantity and see the price online
MZIHO custom pin orders start from 25 pieces per design. Choose the available quantity on the product page to see the current price for the selected configuration. The amount can change with the product, size, quantity, and options, so a displayed starting price should not be treated as the final price for every order.
Upload your artwork and practical notes
Upload the clearest file you have: a vector file, logo, JPG, PNG, sketch, or reference image. Add the wording exactly as it should appear and note any required colors, back details, attachment position, or event date. A clear brief helps the proof focus on the details that matter to you.
Review the configuration and place the order
Before checkout, confirm the product, options, quantity, artwork, contact email, and shipping information. Then pay and submit the order online. Larger-volume orders, unusual structures, or combinations not offered on the page can be discussed with MZIHO before ordering.
Review and approve the digital proof
After the order is received, MZIHO emails a free digital proof. Check spelling, proportions, finished size, colors, metal boundaries, finish, attachment position, and back details. Request revisions when needed, and approve only when the planned artwork and selected configuration are correct.
A digital proof cannot reproduce exact physical weight, texture, gloss, plating reflections, or how every color appears on every screen.
Production begins after approval
Once the proof is approved, the order enters the production route selected for the design. The finished pieces are checked, counted, packed according to the confirmed order, and shipped. Timing depends on the product, quantity, revision time, destination, and current workload, so share a fixed event date before approval.

MATCH THE PROCESS TO THE ARTWORK
Which type of custom pin badge should you make?
Choose the process by what the artwork needs to preserve—not by which option sounds most expensive. These MZIHO gallery examples show the visual differences more clearly than technical names alone.
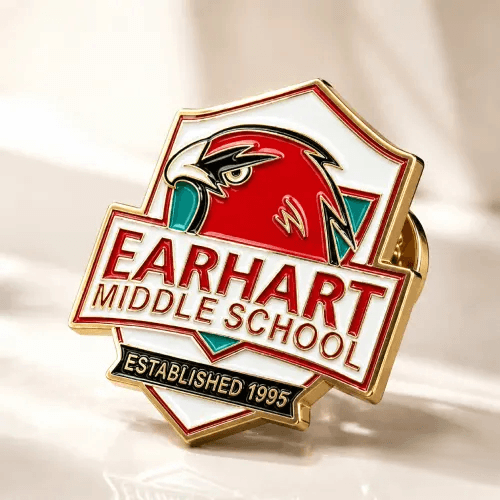
Soft enamel pins
Raised metal lines sit above recessed color, creating a surface you can see and feel.
Choose this if: the design uses bold solid colors, clear outlines, a mascot, or a collectible look. Consider hard enamel for a smoother face or printing when the artwork contains gradients or photographs.
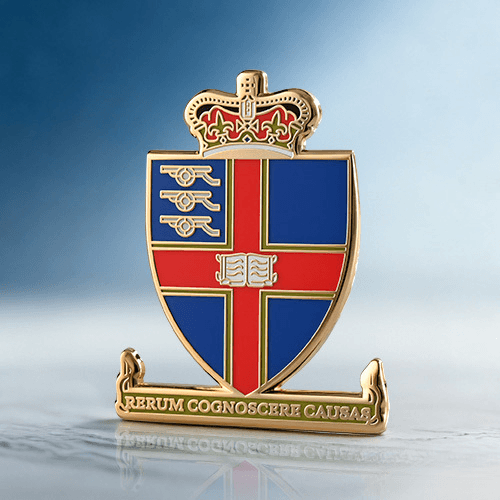
Hard enamel pins
The color is polished nearly level with the metal boundaries for a smooth, clean face.
Choose this if: you want solid color blocks and a refined finish for a brand, club, school, or award. Consider soft enamel when visible texture is part of the design, or printing for photographic detail.
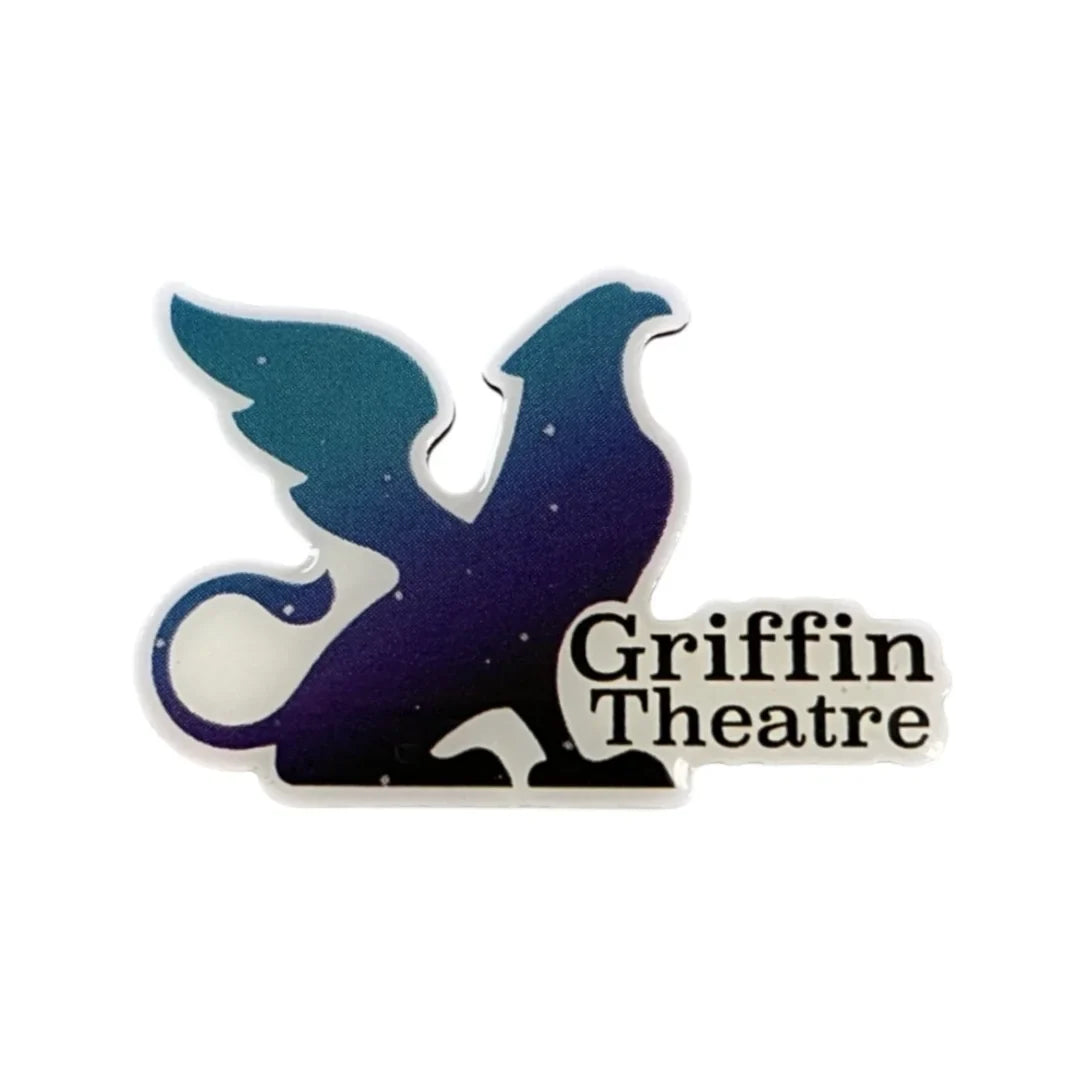
Printed epoxy pins
Full-color artwork is printed and covered by a clear epoxy dome, creating a glossy surface.
Choose this if: your design depends on gradients, photographs, fine details, or small text. Consider enamel when raised metal outlines and separated solid colors are central to the look.

Die-struck pins
Raised and recessed metal create the design without enamel color filling.
Choose this if: you want a classic emblem, service pin, anniversary piece, or restrained antique finish. Consider enamel or printing when color carries important information.

3D cast pins
Sculpted metal relief creates rounded forms and several visible levels of depth.
Choose this if: the artwork features a face, character, product, building, or organic shape. Consider a flatter process when the design is mainly text, line art, or color blocks.
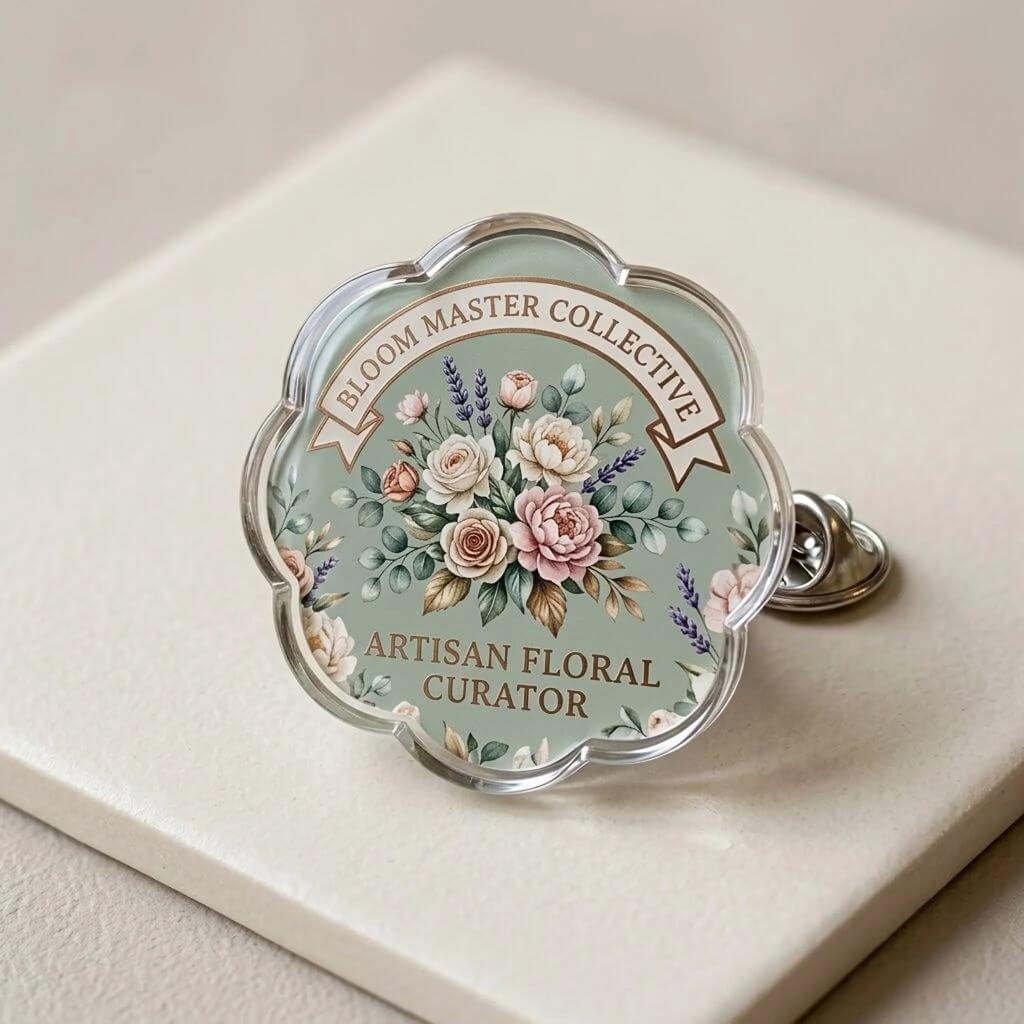
Acrylic pins
Printed artwork sits on a lightweight acrylic base that can follow a custom outline.
Choose this if: you want colorful artist merchandise, detailed illustrations, or a lighter alternative to metal. Consider enamel or die-struck construction when plated metal and weight are important to the finished feel.
BEFORE YOU APPROVE
How to make a badge design ready for production
You do not need to solve every manufacturing detail yourself. Choose the available product options first, then upload enough information for the artwork team to understand what is fixed, what can be adjusted, and how the finished badge will be used.
Upload with the order
- The highest-resolution file you have
- Exact spelling and any required typeface
- Preferred size and overall shape
- Brand color references when they matter
- The quantity selected for each separate design
- How the badge will be worn, displayed, or sold
- Required event date and delivery country
Check on the digital proof
- Finished width and height
- Shape, cutouts, and edge details
- Raised, recessed, printed, and colored areas
- Color references and metal finish
- Pin-post location and chosen clutch
- Back stamp, numbering, or reverse artwork
- Packaging notes that affect production
CHOOSE THE RIGHT ROUTE
Should you make a badge yourself or order custom pins?
Both routes are useful, but they solve different problems. A home button-badge press is practical for paper inserts and very small quantities. Professional production is intended for shaped metal or acrylic pieces, repeatable finishes, custom attachments, and branded presentation.
Choose DIY when
You need only a few simple paper badges, already own the equipment, and do not require a custom metal or acrylic shape.
Choose professional production when
You need a consistent branded product, a custom silhouette, enamel or plated metal, detailed printing, sculpted relief, or a finish that a button press cannot create.
QUICK ANSWERS
Frequently asked questions about making custom badges
How do you make badges from a logo?
Upload the clearest logo file available, choose a target size and quantity, and explain how the badge will be used. The manufacturer reviews whether enamel, printing, all-metal relief, 3D casting, or acrylic will reproduce the logo best, then prepares a digital proof for approval before production.
Do I need a vector file to make custom pin badges?
No. A vector file is useful, but you can begin with a clear JPG, PNG, sketch, or reference image. The artwork still needs to be converted into a production-ready layout, and very small or complex details may need adjustment.
What is the easiest custom badge style for detailed artwork?
Printed epoxy and acrylic pins are often practical for gradients, photographs, tiny text, and full-color illustrations. Traditional enamel works best when the artwork can be separated into solid color areas bounded by metal lines.
What is the difference between soft enamel and hard enamel badges?
Soft enamel normally has raised metal boundaries with cured color sitting lower, creating a tactile surface. Hard enamel is filled and polished so the color sits nearly level with the metal, creating a smoother face.
Can I make only one custom metal badge?
One-off DIY button badges are possible with the right press and parts, but professionally manufactured metal pins use artwork preparation, tooling, finishing, and quality-control steps that are normally suited to batch production. MZIHO custom pin orders start from 25 pieces per design.
Is a digital proof the same as a finished sample?
No. A digital proof confirms the planned artwork, dimensions, color references, finish, and construction. It cannot reproduce exact physical texture, weight, gloss, plating reflection, or color appearance on every screen.
How long does it take to make custom badges?
Timing depends on the product type, artwork complexity, proof revisions, quantity, current production schedule, shipping destination, and any fixed event date. Ask for an estimate based on your approved specification rather than relying on one generic timeline.
Ready to make your custom pin badge?
Choose a pin style, select the available options and quantity, see your price, upload your artwork, and place the order online. MZIHO custom pins start from 25 pieces per design and include a free digital proof and revisions before approval.